Digital and the Darkroom
Several years ago I was walking around the Wesleyan campus, searching for things to photograph for my photography class.
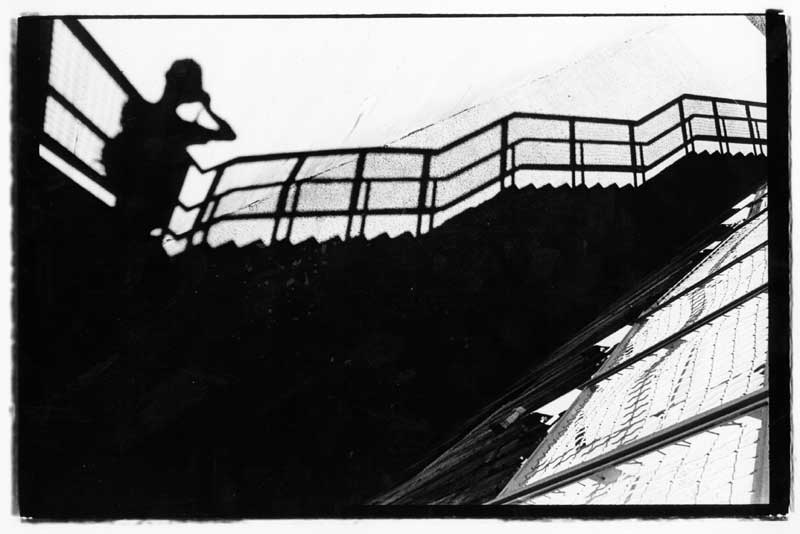
It was an incredibly sunny day, so the shadows were out in full force. Walking up some stairs behind Freeman (the gym) I saw a very
sharp shadow of myself on the brick wall. I decided to snap a few pictures and then continued on my way.
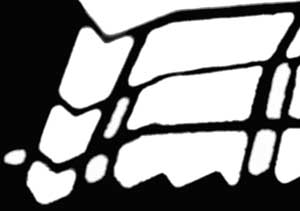
When it came time to print the photo I chose the best one and used a strong filter to boost the contrast - washing out the gray parts
and darkening the dark areas. The image below shows my initial results:
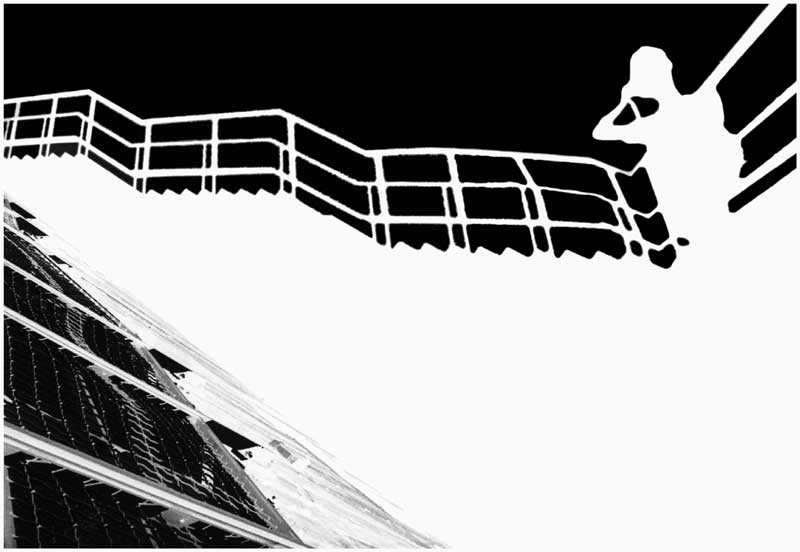
Though I liked the results of the image I was interested in having the
image composed only of black and white (without any gray) to focus entirely
on the shadow. The difficult part was that I wanted the actual staircase
railing (in the bottom right corner) to maintain its natural contrast levels.
So the image I had in my mind was a litho image of the shadow
combined with a normal image of the staircase railing. I was not talented
enough to perform this trickery in the darkroom, so I had to go digital.
I took the 8 x 10 print that I had printed in the darkroom and scanned it in one of the computer labs. Using Photoshop I was able to
turn all the light gray areas to white and all the darker areas to black. The following images shows a comparison of the same areas before and
after the digital manipulation:
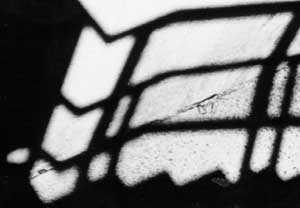
Original Image
Mainipulated Image
Of course having my original conception of the image on the computer was great, but I still had to turn in a photographic print for
my class. A computer print out was not going to cut it. So how to get it from the computer screen back into the darkroom and printed
out on standard photo paper...after some head scratching I came up with an idea.
I had done some experimentation with negative prints before. A negative print is created by putting a piece of paper over an unexposed
sheet of photo paper and blasting it with light. The light travels through the paper and exposes the photo paper.
Example: you put a piece of
paper with a black circle face-down on top of a sheet of photo paper. The black circle lets no light in while the white area around it lets all of the light in. This
creates a reverse image of the top image on the photo paper. Black areas are white, white areas black. So after developing the photo paper the net
result would be a black image with a white circle.
Back to the project. In order to have the final print look right I created a flipped and inversed version of the final image as shown below:
I printed this out on a good laser printer and brought it to the darkroom. As described above, I put the image face down over an unexposed
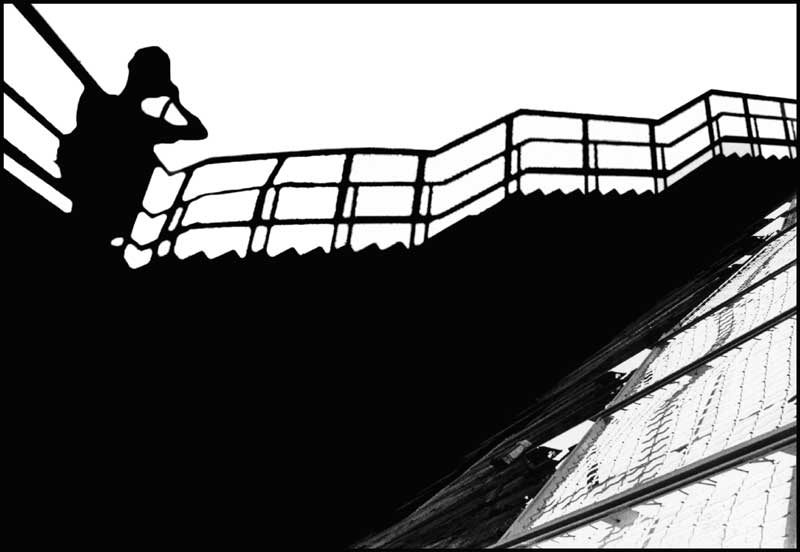
sheet of photo paper and blasted it with light. After running the photo paper through all the nasty darkroom chemicals I had my final print!
You can see the results below...
< < Back
|
|